




This is a bit of a project diary / set of notes for myself, to log the variations on the Fork lift builds that I make / encounter. I don't want to take money from the mouth of another so I won't provide good instructions / support.
There's a free 3D Model on Printables of an RC fork lift, not that that's a new concept, but this maker Professor Boots has some lovely Remote Controlled (RC) models.
He takes requests in the youtube comments for the next model to be designed which is an interesting move.
The recent excavator and crane almost had me as they are really nice, but the models are free while parts lists and instructions are not (which is a fair/interesting model). The software is free though, so you "could" DIY.
He has a skid-steer model (a beginner level RC model) that includes free instructions + BOM as an example of what paying for his workshop guides offers (like software guidance along with instructions, parts buying links, custom pcbs if needed, and general hand holding).
I've considered it a couple of times, but then this fork lift model dropped a few weeks ago, designed to be another beginner level model, and I was hooked (I love forklifts/diggers/tractors - my first word).
I decided to pay for the course in the future, but first, as it's meant to be beginner level and in theory understandable with just the model and youtube video, I decided to have a go without the instructions and just build one out of what I've got lying around...
From the video it looked like it has N20 motors for driving, servos for steering + forklift mast angle, and an ESP32 on a custom PCB with some nice stubby lithium rechargeable batteries.
After closer inspection there are 3 N20 motors (one per front wheel and one for mast height), but no idea what RPM required.
I decided to attempt to use these dollar motor drivers, along with some tiny esp board, but then I got all modular in my head and thought I wonder if Adafruit Feathers or even a doubler would fit.
Sadly the doubler is sooo close but the model would need trimming, however a feather would fit, probably stacked with a DC motor or servo featherwing.
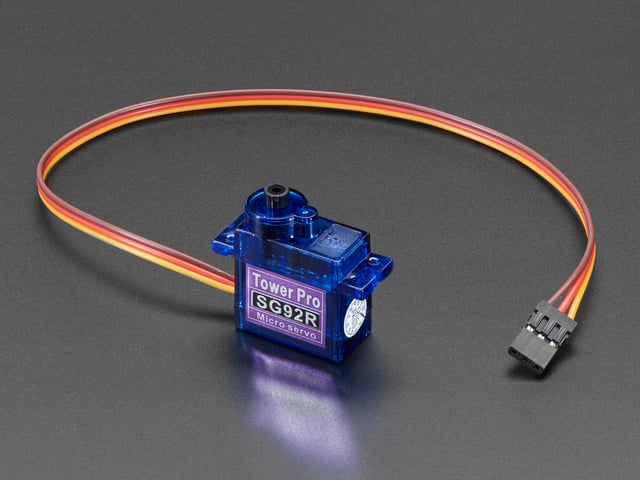
Then I tried the MG90S servos instead of the blue SG90 ones in the video.
And by tried I mean I imported the Main Body .STL file into OnShape (free cad online), and started importing things like servos and feathers to see how well they aligned in the model of the forklift body.
CAD was also a great way to see how some of the parts might fit together, but I decided to guess instead.
It was too tight to use all the things I wanted, the doubler was a no, the AA batteries no, I could do AAA's or some random lipo to be decided in the future. Using continuous servos instead of N20 motors was also out without major body adjustment, so I decided to do a minor boolean operation for the MG90S as a steering servo and leave it at that (the main mast etc was printing at this point).
Test Fitting
Generally good, although not great, but maybe good enough with a tiny bit of cleanup. I should have used supports on some bits, and looking again at the video I can see the mast servo support blocks (above the N20 wheel motors) have been printed with supports.
First assembly of the mast I've used sewing thread, which lasted a few days and many cycles, but by the time I was on my umpteenth cycle of test fitting circuitry before soldering - it snapped. Since then I've grabbed some thin fishing line which I had bought for circuit board / making projects and threaded that up, it's a bit too thin (0.20mm 3.2kg) but I have another thicker size (0.25mm 5.0kg) that I may use for the second forklift.
I think for the first version I've decided it's the Adafruit MiniBoost 5V @1Amp TPS61023 to give the servos 5volts, and rely on the N20 motors running at whatever I give them (I purchased some 3V-6V version a while back and have 3 left) directly from the battery. The brain will be an Adafruit Feather ESP32 v1 "Huzzah32", which will supply the servo signals, and be connected to a DC Motor Featherwing to drive all the motors.
First draft is the Huzzah32 or the Feather ESP32 v1 as I call it (v2 has usb-c). Probably switch to the C6 feather next, but need ESP32 for BT EDR (GamePads)

I was originally going to use the long male headers that come on the pre-assembled DC Motor + Stepper featherwing, and poke them into the feather esp32 board's pcb holes, permanently soldering them together. Instead I decided to use the short female headers as it was only a tiny bit taller once stacked.
Short headers are not essential, but you will need either a male/female combo, or to permanently join the boards. Normal male headers work with short female headers (either accept the extra or trim).


A Motor driver with Four DC Motor outputs. We'll use 3 of the dc motor outputs (and maybe the 4th for Lights)


Some large capacitors. I had some 16v 1000uF electrolytic capacitors lying around so used 2, but anything like these would do:




Battery and some JST-PH plugs and connectors. I used JST male for input, with 3 outputs (2jst + 1wires)


Battery splitter is just the male connector joined to the 3 outputs (two female jst connectors and one set of plain wires), with a 1000uF capacitor joined in the mix to keep the battery voltage from sagging too much.
One JST female will be plugged into the Feather mainboard (ESP32), one will be attached to the 5V boost circuitry, and the final wired output will be hardwired into the screw terminals of the DC motor featherwing.
The 5V Boost is just a JST PH Male connector for PCBs soldered on to the TPS61023 breakout on the Vinput side, along with a 1000uF capacitor on the 5V output side plus the output wires.
The output wires of the 5V boost converter are connected to 3 strips of 4-pin male headers (2.54mm dupont male jumper/header). One each for Ground, Power (5V), and signal.
I've mounted the power+ground strips to a bit of prototype board, and the 4 signal pins are connected via 30AWG silicone wire directly to the DC Motor featherwing.
Test wiring
At this point assuming all the motors are wired up as in the photos and code, it should be good to go.
It might look something like this:


Code:
So there's some arduino code, 3 different examples (wifi, PS3 controller, bluetooth/gamepad version), and I've added my pins and some rudimentary switching to support the DC Motor featherwing (which only uses the I2C pins) instead of direct pin to motor driver configurations.
Then instead of testing that, I ported the wifi example to circuitpython. Made some tweaks to websocket/server code, a link back to edit from the control page, and fixed a few expectation errors. Finally with the code sorted I could wait to solder the last bits no longer, so I did that and then tried out the webpage. It worked, but had this appearance of rebooting when I went full power (brownout?), that actually turned out to be a bug / out of range error. Lastly the steering servo needed adjusting as the original code behaved differently than circuitpython.
Post use notes: Think I missunderstood the original webpage a bit, but I've got the keys and dials working with my new slider ranges, and not over messaging (onKeyDown repeatedly happens when a key is held).
Thoughts:
The model possibly worked better before adding grease. I should probably have used lubricating oil rather than some synthetic grease, or possibly just white lithium grease, and just a dab'll do ya as AvE would say...
Cleanup of the prints in the corner edges of the mast is crucial, ideally that would be avoidable...
You'll notice the weights on the mast in the video to help the fork carriage return, which I may need to adopt.
It couldn't cope with lifting a full cup of tea, maybe for the next one I can have a better voltage at the motor at low batteries point (got some 3Amp boost converters arriving), barely did empty Captain mug.
On the plus side, I killed two batteries as it was great fun regaining my forklift skills, rusty but not forgotten!
V1.1 - Svelte Edition with separate drivers
Initial thoughts are the red dollar motor drivers I've got soldered up already, and a mini S3 board of some type. I did wonder about having a tiny console where the steering wheel is, which displays the ip address (or at least the end bit) on boot, and battery level generally or something. Similar screen size to the tiny lego screen (0.49")
I'd quite like to stick some sensors in there too, show the accelerometer or something, maybe the temperature of the motor drivers, current and voltage too (INA3221).
This page (ProfessorBoots Mini Forklift) was last updated on November 18, 2024.
Text editor powered by tinymce.