


I'm almost ashamed to admit I had a Raspberry Pi 400 that went unappreciated for the longest time. My Dad got it for me as a gift, and it was sitting in a box of spare parts for months. Once I finally got to open it up and take a good look at it, I really wanted to do something cool with it. The Pi 400 was great enough by itself, having a built-in keyboard which you would only need to add a monitor to have a complete computer setup. However, I wanted to have an "all-in-one" setup, with even less wires to plug in. And since I was in a "Fallout" kinda mood, having recently watched the TV series and played one of their games, I decided to model this all-in-one casing based off of the terminal featured in the Fallout game series.

The general idea was to build a plastic casing to house all the pieces, and extend the Pi 400's ports with panel mount cables. First things first, I needed a monitor. It took me a while to find a monitor that I liked, but in the end, the one pictured above was what I settled on. However, I realized much too late that the monitor in question turned out to be a 12V monitor, and I was trying to have all the pieces be consistently 5V. I needed to adapt my strategy if I wanted to have a system powered by only one adapter. So, I bought a power adapter that output 12V and 5A, which I would use to power the monitor first, then bring the remaining power down to 5V via a buck converter.

In addition to powering the monitor and the Pi 400, I also wanted to put some colored lighting in the back of the terminal, for no other reason than to imitate how it looked in the game. Of course my mind immediately jumped to the thought of using neopixels. At first I was going to use an Arduino nano to control the LEDs; after all, it was cheap to buy and simple to program. But then, I realized I might want to change the lighting at different points in time. Ultimately, I went with a neat little trick, one I had used before in the past.
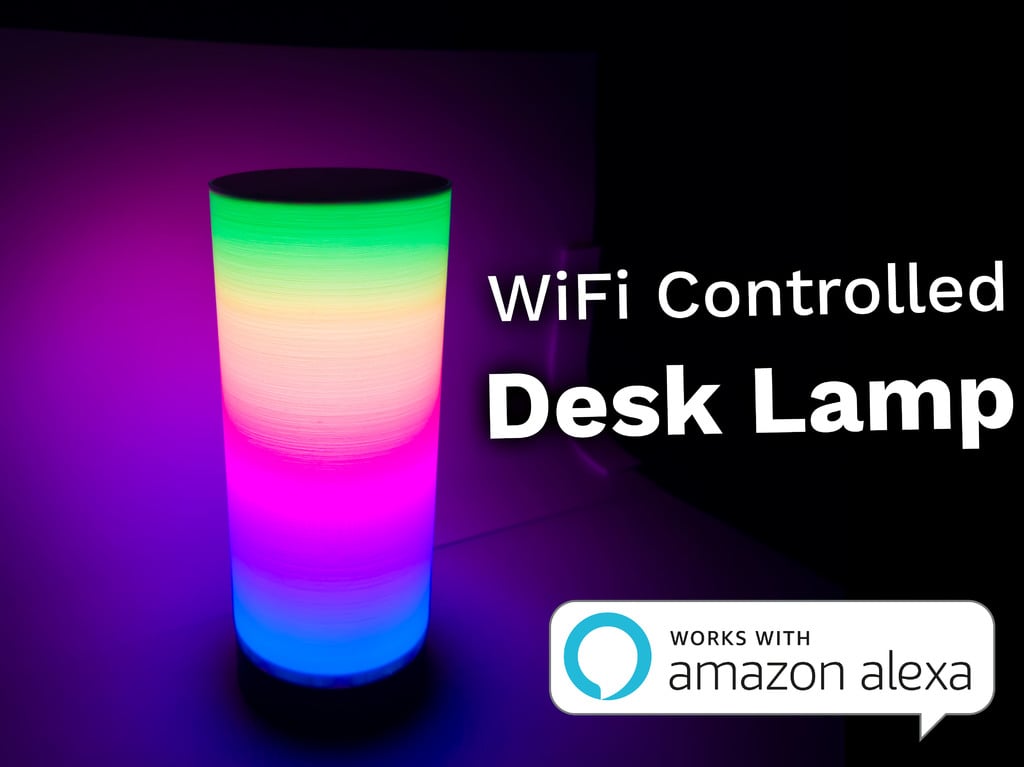
User Surrbradl08 of Thingiverse made a neopixel desk lamp which I enjoyed building. After making it, I used the code of it in other projects, such as a Christmas tree topper. This desk lamp uses a ESP8266 chip to make this lamp a WiFi server that I can control over the internet, which is great because I can use the Pi 400's browser to communicate with this chip and change the lighting from there. The ESP8266 came on a part called the Wemos D1 mini, which I have plenty of.


With the lighting constructed, it was time to actually stress test the whole assembly, just to make sure I really could power everything with one power supply. So, I plugged in everything I was going to use and turned it on. The results were absolutely astounding!

By now you're probably wondering what was shown in the bottom left of the above picture. That is a "holotape", which in the Fallout games is a data storage format. If you found one in the game, you could pick it up and play it to hear an audio file that was stored on it.

These holotapes were made for a separate but more complex Fallout-related project: a replica of the Fallout TV series' Pip-Boy. The Pip-Boy is a wrist-mounted device that also had the capability of playing holotapes, so they were created for that project first, and giving my Pi 400 the ability to read them came later.

The reason these holotapes have any data on them at all is because they are actually flash drives. Each holotape has a 16GB flash drive chip installed. However, to fit them in such a slim casing required some impressive execution, and it was easier to solder the contacts of the flash drive chip to header pins than awkwardly shove a USB port somewhere.


These header pins are what make the USB connection work. I have female headers installed in the holotapes, and male headers for anything that read them, including the holotape slot that went into my Pi 400's plastic casing.

Instead of a flash drive chip, this special red holotape has LEDs inside that are powered by the USB connection. This is to safely test the reading devices, because reversing the pins on one of my actual flash drive chips would destroy it.


With the holotape slot and the wi-fi lamp out of the way, it was time for printing the main pieces of the terminal. The concept was to have three main pieces. The back panel, which would be where the power was delivered, and where I would mount my little lamp construct. The front panel, which was what held the Pi 400, the monitor, and the holotape slot. The final piece would be a large frame to hold together the front and back panels, in addition to extending more of the pi 400's ports. I got to work on printing the back panel first. In the back panel of my case, I had to wire up the entire power supply. This was the biggest part that needed any real soldering, as the other connections were made with bought cables. Also to be mounted in the back was a micro HDMI cable that would have a full size HDMI port on the other end. I intended to take full advantage of the ability to have two screens for this project.


With all three parts complete, then the real assembly began. First, I screwed the front panel into the frame. Since the front panel was too flimsy to support the Pi 400 and the screen by itself, I waited until the front panel was held in place by the frame to start inserting components.


As for the software side of things, I had a 128GB SD card with the Raspberry Pi OS all ready to go. 128GB may have been too much, but I wanted this to last. The SD card slot was the only thing I didn't give external access to from the terminal's casing, the intent was to run only the Raspberry Pi OS on this device and nothing else.


Now that the terminal was complete, I was allowed to really let loose. in the short time since I put this together, I collected PDFs of "The MagPi", added a bunch of code editing programs, and got DOSBox installed. My intent behind doing all this was to use this as a programming computer, specifically for writing code for other Raspberry Pi projects. One thing's for sure: no matter where my DIY electronics hobby takes me, I have a Raspberry Pi-based computer that's truly "special".
This page (I turned the Raspberry Pi 400 into a Fallout-style terminal!) was last updated on November 10, 2024.
Text editor powered by tinymce.