



Do you have a pair of Adafruit LED Glasses? Have you noticed there is a ton of cool examples and starter projects out there for them? Have you ever wished you didn't have to juggle installing different projects in order to use each one? Do you want to use a Wii Nunchuck for wireless game-like controls? Would you like to also be able to use the Adafruit Bluefruit Connect app to do things like change colors or other settings? Did you ever wish those settings would be saved, even when you turn the glasses off? Do you wish you could install it by simply dragging and dropping a file?
Overview
Well, I have. And if you have too, you're in luck! I wrote some firmware that compiles some of my favorite Adafruit starter projects into a single firmware, plus a couple of new ones of my own.
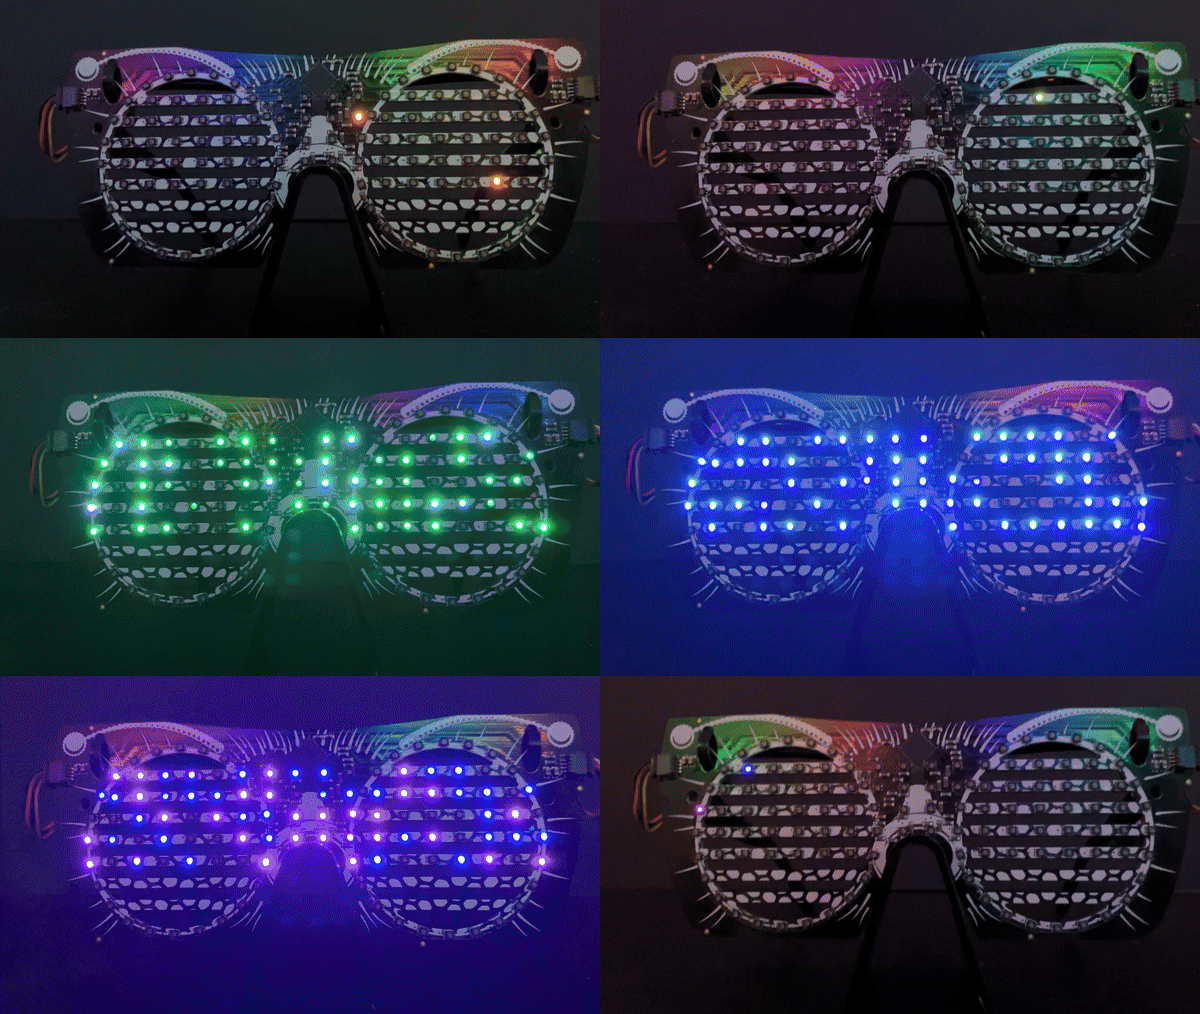
Motivation/Goals
I wrote a bare-bones demo a few years ago using the Wii Nunchuck to control an adaptation of the classic Adafruit roboface project, played with it for a few minutes, and then promptly forgot about it. I recently rememberedI had the glasses kit, and with Halloween around the corner I thought it would be fun to wear them this year, sporting a more robust firmware than my original demo.
I wanted to have a small suite of different modes available to use, and be able to control them wirelessly. The first part of the project was building a small adapter I could use to allow my Nunchuck to pair and communicate with my glasses using Bluetooth Low Energy. With that complete, it was time to write the firmware for the glasses. I wanted the firmware to have the following features:
- It should have the ability to pair with the BLE nunchuck adapter and use the nunchuck for wireless control
- It should have the ability to connect to the Adafruit Bluefruit Connect app to change colors and other settings
- The glasses should still work well even without some form of wireless control
- It should have modes that take advantage of the built-in accelerometer and microphone on the glasses driver board
- It should have an application/firmware architecture that makes it simple to add new modes in the future.
- Optionally, it should have the ability to connect an EEPROM breakout to the remaining Stemma QT port on the other side of the glasses to save changed settings, even when the glasses are powered off.
Featured on 3D Hangouts!
Check out Noe Ruiz showing off his awesome Halloween prop idea using the Sparkle Specs firmware on 3D Hangouts!
Firmware Update
Version 1.1.0 has been released, which allows setting the brightness for the current mode using the Bluefruit Connect app. Updating is as easy as copying over the new .uf2 file!
Compatible Hardware
The simplest option is to buy the full LED glasses kit. It includes everything you'll need (aside from an optional component listed below). If you want a more custom solution, then at the minimum you'll need the following hardware to use this firmware:
Optional hardware:
The firmware also supports attaching an EEPROM breakout board for saving and loading settings (I used a small bit of VHB foam tape to attach the breakout to the other stem of the glasses). With this board plugged in, the firmware will remember things like which mode you were using last, color adjustments, and various other settings. If you decide to use it, don't forget to pick up another 50mm Stemma QT cable.
Firmware installation
There are two ways to install the firmware: by installing the UF2 binary on the board directly, or by building from source with PlatformIO.
UF2
For easy installation, you can install the pre-built UF2 file using the following steps:
- Download the UF2 file here
- Plug in the glasses driver board to your computer's USB port
- Click the reset button on the driver board twice
- The GLASSESBOOT drive should appear on on your computer
- Copy the UF2 file you downloaded in step 1 to the GLASSESBOOT drive
That's it!
Build from source
Due to the larger scope of this project and number of source files (for an Arduino project) I chose to use the PlatformIO environment. I recommend using Visual Studio Code with the PlatformIO IDE plugin. Once PlatformIO is installed, you can download the source code for the project from github. Open the project in the VSCode workspace. Make sure your glasses driver board is plugged in to your computer, and press the Upload button in the top right of the VSCode screen. The code should compile and upload to your board.

Usage
Once the firmware is uploaded, it should boot into the first mode, "Shifty Eyes". If you would like to use an EEPROM, turn off glasses using the built-in power toggle switch, and plug the EEPROM breakout into the board. Power the glasses driver back on. That's it! The firmware will automatically detect the presence or absence of the EEPROM and behave accordingly.
Controls
While wireless control is possible using the Bluefruit Connect app or the nunchuck BLE adapter, neither is required, and the firmware works great even without them. Below is a description of the various controls available. Note that you can use the nunchuck BLE adapter and the Bluefruit Connect app at the same time!
Basic
The glasses driver board features a single user button labeled SW. This button can be used to change modes. Quickly press and release the button to cycle to the next mode (or wrap back around to the first mode once the last mode is reached).

Bluefruit Connect app
You can download the Adafruit Bluefruit Connect app on your phone and use it to control various aspects of the glasses.
Download the app from one of the links below, depending on your phone type:
Once you have the app, it's easy to get started. Open the app, and connect to your glasses:

Once connected, the red LED on the glasses driver board will light up. In the app on your phone, you'll see the modules list. This firmware uses two of the modules: UART and Controller.

The UART module is used to set the message in "Marquee" mode, and all of the modes use features from the Controller module's Control Pad and/or Color Picker submodules.
The control pad features 4 direction buttons and four general-purpose buttons labeled 1-4.

The Left and Right arrow buttons are global controls (they can be used in any mode), and are used to move to the previous/next modes, respectively. The specific controls for the other buttons are described in detail for each mode in the Modes section.
The Up and Down arrow buttons adjust the brightness for the current mode. Each mode has its own brightness setting.
Each mode takes advantage of the color picker to allow choosing the color of some aspect of the "scene".

For some modes, the color Black (rgb: 0, 0, 0) is a special value, that returns the mode to it's "default" color setting. Slide the "brightness" slider all the way to the left to set the color to black (Refer to the image below). Don't forget to slide it back to the right later if you want to change the color again!

Nunchuck with BLE Wireless adapter
If you've built a BLE Nunchuck Adapter, pairing is easy.
- Turn off the nunchuck adapter that you want to pair with the glasses.
- Power on the glasses driver board.
- Press and hold the SW button on the driver board until the green LED lights up (about 3 seconds).
- Press and hold both nunchuck buttons while powering on the nunchuck BLE adapter. The green LED on the adapter should light up, and the blue LED should flash.
- If successful, the devices will pair. The NeoPixel on the glasses driver board will turn blue, and the flashing blue LED on the adapter will turn solid.

Globally (in every mode), shaking the nunchuck will change to the next mode, just like pressing the SW button on the driver board. The specific controls are described in detail for each mode in the Modes section.
Below is a description of each mode currently in the firmware. Each description will feature a list of controls and settings that can be modified by either the BLE Nunchuck adapter or the Bluefruit Connect app:

This mode features a set of twitchy pupils and blinking eyelids, inspired by the classic Roboface demo. When connected to the nunchuck adapter, the nunchuck can be used to control the pupils and rings. When not connected, the pupils move around and the rings blink at random. With the Bluefruit Connect app, you can change the colors of both the pupils and the rings, and you can choose between "normal" pupils and "monster" pupils.
Nunchuck Controls
- The analog stick can be used to move the pupils around.
- The Z button blinks the rings. If held down, the eyes remain closed.
- The C button "scowls".
Bluefruit Connect
- The Color Picker feature of the Bluefruit Connect app can be used to change the color of both the pupils and the rings. The pupils will be set to the chosen color, and the rings will be set to the next major color counter-clockwise in the color wheel (for example, setting the pupils to red will set the rings to yellow as well). Setting the color to Black (rgb: 0, 0, 0) will have no effect. You can also use the Control Pad buttons to set the pupil and ring colors separately for further customization.
- The following buttons in the Control Pad can be used:
- 1 - Toggle between "normal" pupils and "monster" pupils
- 2 - Press and hold to cycle pupil hue. Release to stop cycling.
- 3 - Press and hold to cycle ring hue. Release to stop cycling.
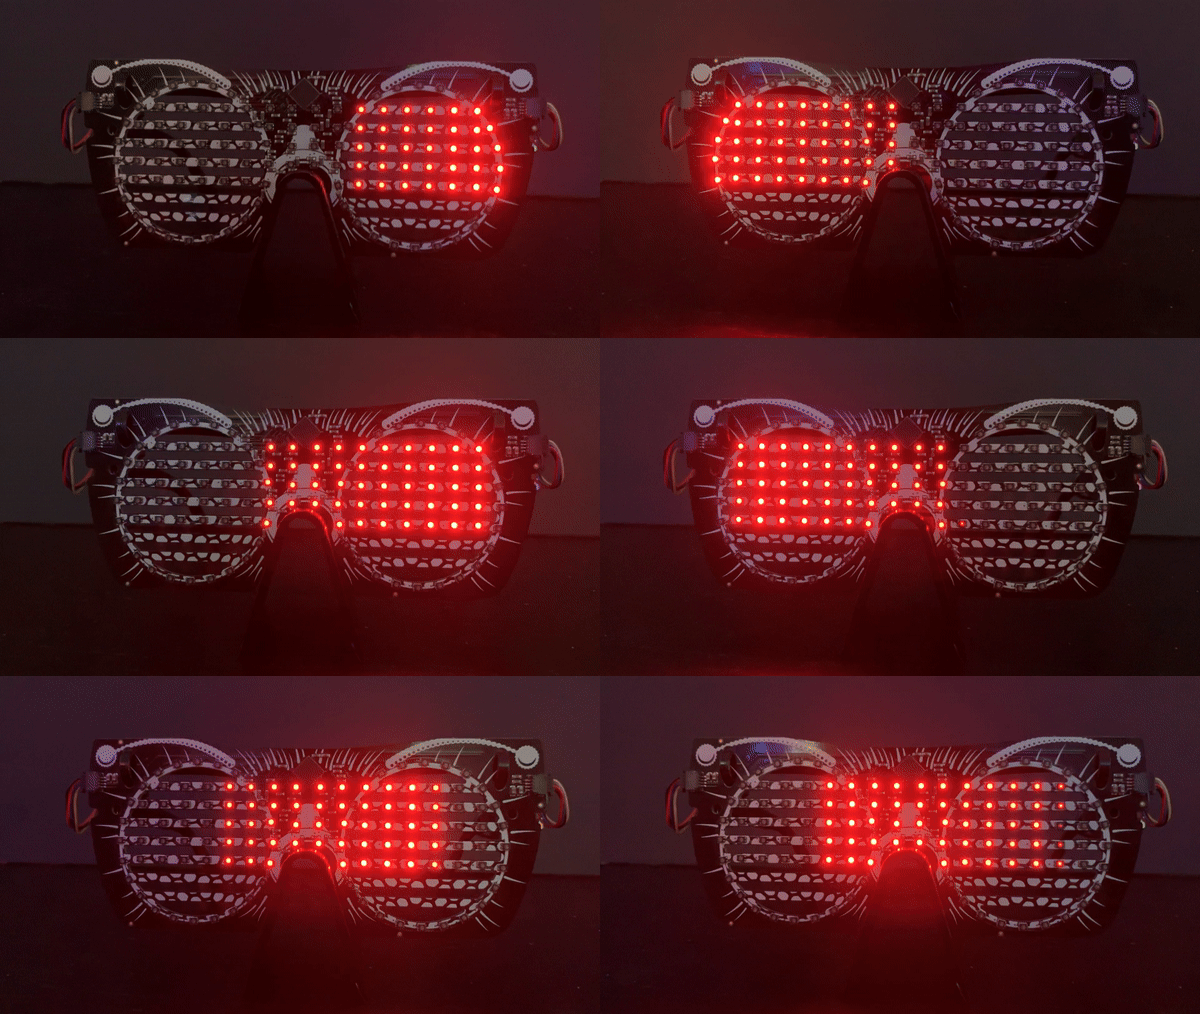
This mode features an effect similar to the Cylon eyes effect from the show Battlestar Galactica. When the nunchuck adapter is connected, the shape and position of the "eye" can be controlled. When not connected, the beam will move automatically depending on the beam mode.
There are three beam modes:
- Vertical: The beam is vertically oriented and moves left and right
- Horizontal: The beam is horizontally oriented and moves up and down
- Point: The beam is a point that can be moved in all directions.
Nunchuck Controls
- The analog stick is used to move the beam.
- The Z button changes the beam mode.
- Holding the C button adjusts the color of the beam. Release the button to stop adjusting the color.
Bluefruit Connect
- The Color Picker feature of the Bluefruit Connect app can be used to change the color of the beam. The color Black (rgb: 0, 0, 0) will have no effect in this mode.
- The following buttons in the Control Pad can be used:
- 1 - Set automatic speed to slowest setting.
- 2 - Set automatic speed to medium setting.
- 3 - Set automatic speed to fastest setting.
- 4 - Change beam mode

This mode was adapted from the Googly Eye Rings starter project from the glasses learn guide. When the nunchuck is connected, it will control the eyes. When not connected, the eyes will be controlled by the built-in accelerometer on the glasses driver board.
Nunchuck Controls
- Moving the analog stick will move the eyes around
- Press and hold the Z button to "Grab" the eyes, and rotate the nunchuck to spin them around. This is just an alternate way to move the eyes around, utilizing the accelerometer data from the nunchuck.
- Holding the C button adjusts the color of the rings. Release the button to stop adjusting the color.
Bluefruit Connect
- The Color Picker feature of the Bluefruit Connect app can be used to change the color of the rings. The color Black (rgb: 0, 0, 0) will have no effect in this mode.

This mode features a volume meter, inspired by the Adafruit VU Meter project. It takes advantage of the built-in microphone on the glasses driver to sample the surrounding audio and display an approximation of the volume.
Nunchuck Controls
- Holding the C button adjusts the color of the rings. Release the button to stop adjusting the color.
- Pressing the Z Button returns the color of the rings to the default color setting (green to red).
Bluefruit Connect
- The Color Picker feature of the Bluefruit Connect app can be used to change the color of the rings. Choosing the color Black (rgb: 0, 0, 0) will return to the default color setting (green to red).

This mode was adapted from the Music-Reactive Lights starter project from the glasses learn guide. It uses the built-in microphone to display a portion of the sound spectrum in the surrounding environment.
Nunchuck Controls
- Holding the C button adjusts the color of the rings. Release the button to stop adjusting the color.
- Pressing the Z Button returns the color of the rings to the default color setting (rainbow spectrum).
Bluefruit Connect
- The Color Picker feature of the Bluefruit Connect app can be used to change the color of the rings. Choosing the color Black (rgb: 0, 0, 0) will return to the default color setting (rainbow spectrum).
- The following buttons in the Control Pad can be used:
- 1 - Toggle the white tops on/off

This mode uses the built-in microphone on the glasses driver to sample the surrounding audio and display a sparkly visualization.
Nunchuck Controls
- Holding the C button adjusts the color of the sparkles. Release the button to stop adjusting the color.
- Pressing the Z Button returns the color of the sparkles to the default color setting (rainbow).
Bluefruit Connect
- The Color Picker feature of the Bluefruit Connect app can be used to change the color of the sparkles. Choosing the color Black (rgb: 0, 0, 0) will return to the default color setting (rainbow)

This mode is an adaptation of the Bluetooth Message Scroller starter project from the glasses learn guide.
Nunchuck Controls
- Moving the analog stick left/right will adjust the text scroll speed
- Holding the C button adjusts the color of the rings. Release the button to stop adjusting the color.
- Pressing the Z Button returns the text color to the default color setting (rainbow).
Bluefruit Connect
- The Color Picker feature of the Bluefruit Connect app can be used to change the color of the text. Choosing the color Black (rgb: 0, 0, 0) will return to the default color setting (rainbow)
- The UART module of the Bluefruit Connect app can be used to change the message text:
- Select the UART module from the modules list in the app.
- Tap the text field at the bottom of the screen.
- Start your message with the $ character. For example, to send the message "Hello!", type $Hello! into the text box and and press the send button. The firmware supports messages of up to 127 characters.

Erasing the EEPROM/Restoring default settings
If for any reason you'd like to reset everything back to the default state, you can follow these steps:
- With the glasses powered off, make sure the glasses LED PCB and EEPROM breakout board are plugged into the glasses driver board.
- Power on the glasses driver board. Wait a second or so.
- Quickly press and release the reset button on the glasses driver board. Wait just a quick beat, and then press and hold the SW button on the glasses driver board, until all of the LEDs on the glasses LED PCB turn blue.
- Release the SW button.
The EEPROM should now be restored to the default settings. If the LEDs on the glasses do not turn blue, but instead on the glasses driver board you see:
- The on-board red LED is flashing and the NeoPixel is solid red
or
- the on-board red LED is slowly pulsing and the NeoPixel is green
Then you probably pressed the SW just a little bit too soon and entered boot mode. You can just start at step 3 above and try again.
If the glasses booted normally, and you did not see all of the LEDs on the glasses turn red, then you probably pressed the SW button a little too late. You can just start at step 3 above and try again.
This page (Sparkle Specs firmware for Adafruit LED Glasses driver) was last updated on October 16, 2024.
Text editor powered by tinymce.