Getting Started
Adafruit Playground is a wonderful and safe place to share your interests with Adafruit's vibrant community of makers and doers. Have a cool project you are working on? Have a bit of code that you think others will find useful? Want to show off your electronics workbench? You have come to the right place.
The goal of Adafruit Playground is to make it as simple as possible to share your work. On the Adafruit Playground users can create Notes. A note is a single-page space where you can document your topic using Adafruit's easy-to-use editor. Notes are like Guides on the Adafruit Learning System but guides are high-fidelity content curated and maintained by Adafuit. Notes are whatever you want them to be. Have fun and be kind.
Click here to learn more about Adafruit Playground and how to get started.
-
Sword of Shannara on Microbit I enjoy programming little projects on the Microbit and CircuitPlayground because I find it easy to work on them "on the go"! This project meant I was able to start working on a computer, then continue the initial Makecode work using the iOS Makecode app - saving work to Github when switching from PC to phone and back.
It came about because I recently was reading through the Shannara stories, and that lead me to come up with some Microbit programs for this simple "Sword of Shannara" game in python and Makecode.
This is a vastly (!) simplified version of the classic fantasy "The Sword of Shannara."
Screen above shows "you," representing the hero, Shea Ohmsford, who is searching for the Sword of Shannara. You move left/right through a scrolling landscape (100 cells wide) displayed on the 5x5 LED micro:bit screen.
Overhead are dots that represent the "Skull Bearers" (think Tolkien's Nazgul). If you delay when one is overhead, it will attack and you can lose one of your five lives. So either move past quickly, or hit A+B to unleash the Elfstones to eliminate the Skull Bearer. Faint dots along the bottom of the "screen" represent landscape and serve to show your movement left/right.
Somewhere in the middle of the 100-element landscape is the "Sword" represented by three lit pixels.

-
Fruit Jam Color Checker This color checker is part of my quest to improve color matching from sprite editor apps to sprites displayed by CircuitPython. I wrote code to generate several color charts that explore how RGB332 and RGB565 colors on Fruit Jam's DVI output compare to the colors on a regular computer.
For previous projects, I've used sprite editor apps on iOS or Linux to prepare sprites for CircuitPython. In each of those cases, I've noticed color shifts, but so far I haven't fully understood what was going or how to correct it. This time, I want to do better.
Transparency note: Adafruit provided the Fruit Jam rev B prototype board I used for this guide (Thanks Adafruit!).
Overview

-
Encrypted Mesh Communicator with Thermal Camera Things You Need
Soldering Tools
You will need some basic soldering supplies for connecting wires to one another and to the T-Deck (although I'm working on a DIY design that does NOT require soldering). Heat shrink wrap is also recommended.
Other Supplies
There may be other miscellaneous supplies/tools not mentioned here.
3D Print Your Case
Download printable enclosure files (includes 3MF and STL formats). The printable enclosure is a slightly modified version of an enclosure originally designed by Alley Cat.
I use Black ABS for the front and colored PLA for everything else, but obviously you can get creative here.

-
¥enPocket 80 - A Handheld Arduino Console Inside Of An VHS Tape Build the ¥enPocket 80 – A Retro Handheld Console from a VHS Tape!
Hi, I'm Miguel (aka @miguel_drmr), a 16-year-old indie creator from Brazil, and I’m super excited to share my DIY console:
The ¥enPocket 80 — a tiny retro-style handheld game console made from recycled VHS tapes, powered by an Arduino UNO, and super easy to build!
No 3D printer? No soldering experience? No problem. Let’s bring retro vibes to life with just a few cheap parts and some creativity.
What You’ll Need:
- 1x Arduino UNO (clone works!) The brain of the console
- 1x OLED Display 0.96" (I2C) The tiny screen
- 1x Pushbutton To control the game
- Jumper wires (male-male) For wiring everything up
- 1x Old VHS tape (used) The console shell! Reuse & recycle!
- 1x Simple box (optional) To pack or transport
Wiring the Console:
Let’s wire it up!
OLED Display:
VCC → 5V
GND → GND
SCL → SCL
SDA → SDA
Pushbutton:
One leg → Digital Pin 2
Other leg → GND
(We’ll use INPUT_PULLUP in the code)
Step 1: Prepare the Shell
Grab your VHS tape and open it up (trust me, this part is fun). Remove the reels and internal gears carefully.
Cut a hole where the screen will go — usually in the middle window of the tape.
Add a small hole for the button, and maybe one more for the USB cable if needed.
Step 2: Connect Everything
Use jumper wires to hook up the display and the button to your Arduino.
You can test the display using any basic I2C screen sketch.
Once it’s working, fix the screen behind the VHS window using glue or tape. Do the same for the button.
Step 3: Upload the Game
Use the Arduino IDE to upload the built-in game. You can use a Dino Run clone, a reaction tester, or any 1-button game.
I’ll link my open-source version here: ¥enPocket-Github
Step 4: Close It Up
Reassemble the tape and seal it — either with the original screws or with tape.
You now have a fully working game console inside a VHS tape!
Share Your Games:
You can share your games made for your ¥enPocket 80 on my Official Forum:

-
Fruit Jam Gamepad Tester This is a visual gamepad tester for CircuitPython on Fruit Jam. The tester can detect and map buttons for several common gamepad types, including the Adafruit SNES-like gamepad. The tester can also display hexdumps of input event reports from HID boot-compatible keyboards and mice. Other HID devices may also work as long as their report lengths are short enough to fit on the screen (about 8 bytes).
I wrote the code on CircuitPython 10.0.0-alpha.4 through 10.0.0-alpha.6 on a rev B Fruit Jam prototype. Using a Metro RP2350 with USB hub would probably work too. I haven't tried that, so it's possible you might need to make minor tweaks to the code for pin names (e.g. boot button and DVI out).
To learn more about the spritesheet animation I use for the gamepad visualizer, check out my Feather TFT Gamepad Tester with Sprites guide from last year. This version of the tester for Fruit Jam is based on the Feather TFT version. For Fruit Jam, I added support for the larger display and more gamepad types.
Transparency note: Adafruit provided the Fruit Jam rev B prototype board I used for this guide (Thanks Adafruit!). Adafruit makes good stuff, please support them by buying from the Adafruit shop.
Overview

-
Reading a Digital Dial Gauge using official usb serial cable (Web-serial, python, nodejs) Wanting to investigate a slightly Heath-Robinson idea to improve my CNC work setup process, I grabbed a digital dial guage (0-25.4mm) for probing things... The device had a cable option which I initially skipped, but the connector was a pain and rather than destroy my device to solder in a socket I bought the cable (for £1.99+tax).
It's supposedly 1.37volt logic, but the cable converts to RS232, and they included a USB-RS232 adapter. The device and cable came with 2x 8cm Compact-Discs (CDs) for software drivers and official software. I do actually still have a DVD/CD combo drive in one laptop, but forget about that. The instructions showed it in Chinese and windows only, and I plan to use a Raspberry Pi, so I went straight to an LLM to make a prototype web-serial demo.
Claude started the project, then I moved to claude-code in the hope claude would read the serial output too, but I/it got distracted with it nearly working for ages. In the end claude-code took it down an alley of insanity, and I switched to vscode in Agent mode to start afresh at the same time. VsCode sorted it right out first time. Then a quick correction for the initial boot messages received, and finally glam it up a bit along with adding scaling to the dial. Of course to use it with the Pi it would need converting to python/node, so I did that and tested via WSL.
Source Code / Readme etc:
https://github.com/tyeth/digital-dial-gauge-web-serial
Interactive Webpage:
https://tyeth.github.io/digital-dial-gauge-web-serial/
Live embedded iframe/oEmbed version:

-
I2C FRAM Memory Carts These removable non-volatile memory cartridges should work with the new Fruit Jam board and many other Adafruit microcontroller boards with I2C. The 3D printed shells hold a perma-proto PCB with a 4-pin magnetic connector and an I2C FRAM breakout board. To avoid I2C bus glitches, the base includes TCA4307 hot-swap I2C buffers and a PCA9546 4-channel I2C multiplexer. The multiplexer makes it possible to use two FRAM chips with the same I2C address at the same time.
The CircuitPython code for this project is just a simple demo of writing to and reading from FRAM using the byte array interface provided by the adafruit-circuitpython-fram library. To use these memory cartridges for game save files, you would need to come up with a way to encode whatever data you want to store into a byte array of 32KB or less.
Transparency note & shameless plug: Adafruit provided most of the parts I used for this guide (Thanks Adafruit!). Adafruit makes good stuff, please support them by buying from the Adafruit shop.
Overview

-
Countdown Complete: It's finally here! 🎉 Upgraded Actions on IO - How to do Math(ematics) Blockly has been slowly worming it's way into Adafruit IO, with a first edition replicating the old Action forms.
Now the latest release brings the wealth of features we've been dreaming of, allowing great complexity!Will you be the first to bring down the house of cards/servers? Let us know in the forums if you do (or run into other issues)! Let's start off with something simple, how to subtract one from a feed value (as a countdown)...
We'll explore a quick yet complex multi-action example, changing LED colour based on air quality, and additionally a Utility Light mode using the onboard button to request 30seconds of Bright White Light (useful in a kitchen).
Setup a Wippersnapper device
Adafruit IO has a devices page, which shows the special "Wippersnapper" devices, these run the arduino firmware that allows wifi connected boards to easily connect and configure components (inputs/outputs/sensors) with no code. Each component then has associated feeds for interacting with, so using the on board button becomes child's play.
Install wippersnapper, you're best off finding the learn guide for your board and then locate the Wippersnapper pages. Alternatively there is a quick start guide, or just do the usual hacky thing and have a go with no prior knowledge...
Visit this link (https://io.adafruit.com/devices/new) when signed in to be taken to the New Device setup page, then select your board and follow the onscreen instructions.
(You need an IO page open when the board first connects to accept the registration request).
-
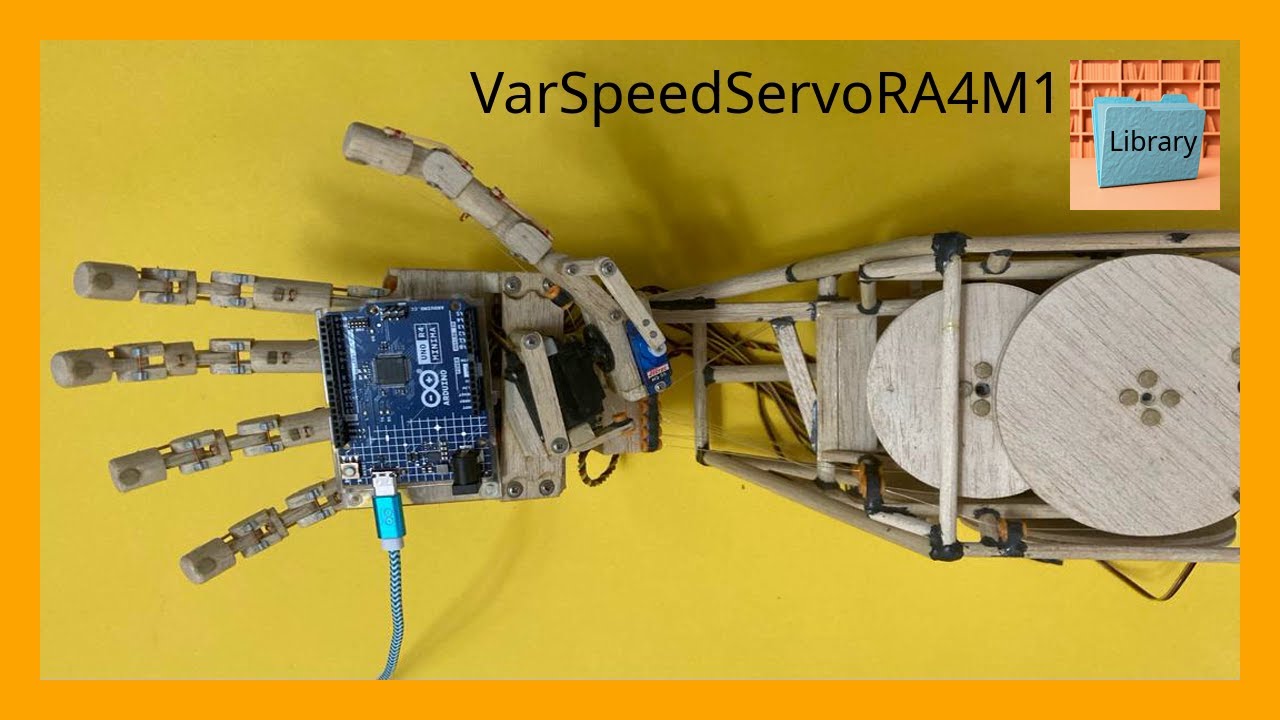
VarSpeedServoRA4M1 VarSpeedServoRA4M1 is a library for Arduino tha enables precise control over servo motors, including speed, position, and movement sequences.
Developed by Kaled Souky in 2024, based on the Servo library (developed by Michael Margolis in 2009) and VarSpeedServo library (developed by Korman in 2010 and updated by Philip van Allen in 2013). Specifically designed for the Renesas RA4M1 microcontroller architecture (Arm Cortex-M4), present on the Arduino UNO R4 Minima and Arduino UNO R4 WiFi boards.
VarSpeedServoRA4M1 is an interrupt-driven library using 16-bit timers, allowing the use of up to 12 servos moving asynchronously or synchronously. In addition to setting the position, you can set the speed of a movement, optionally wait until the servo movement is completed, and create sequences of movements that execute asynchronously or synchronously.
The 32-bit Renesas RA4M1 processor operating at 48 MHz elevates servo control to a new level, providing higher PWM resolution compared to the ATmega328P used in Arduino UNO R3. Thanks to this power, VarSpeedServoRA4M1 fully exploits the microcontroller's capabilities. With its simple and intuitive syntax, this library facilitates precise control over servo position and speed, even for beginners. Creating complex movement sequences is straightforward with just a few commands.
Features :
- Supports up to 12 servos.
- Allows synchronous and asynchronous movement of all servos.
- Allows you to configure the "position" and "speed" of each servo individually.
- Includes a "wait" parameter to wait for the servo to complete its movement. Philip van Allen, in his update, incorporated it as a boolean variable within the
write()function, and also as the independentwait()function. This parameter is not included as a variable in Korman'sslowmove()function. - The
write()function now includes the "speed" and "wait" parameters, which can optionally be used in conjunction with the "position" parameter to control servo movement. - The
slowmove()function is retained for compatibility with the Korman version. It only handles the "position" and "speed" parameters. In this case, the waiting time must be configured (using, for example, the functiondelay(),delayMicroseconds(),micros()ormillis()), so that the servo completes the position and maintains it for the desired time. Theslowmove()function does not incorporate the "wait" variable introduced by Philip van Allen in thewrite()function. - Allows the creation of position sequences.
Examples of use:
Sample code 1: Sweeps a servo motor from 0 to 180 degrees at fast speed and back from 180 to 0 degrees at slow speed, in an infinite loop.
The
write()function now includes the "speed" and "wait" parameters, which can optionally be used in conjunction with the "position" parameter to control servo movement.The "wait" parameter is used to wait for the servo to complete its movement. It is also available as a standalone
wait()function.Image taken from the official Arduino website: https://docs.arduino.cc/learn/electronics/servo-motors/
-
The Many Possibilities of Adafruit IO Actions and an Arcade Button Overview
As we get closer to launching the new Adafruit IO Actions, it has been fun thinking of the many fun ways it can be used. Here is a really simple project that has a ton of potential without writing a single line of code. With this project, I simply added a NeoPixel to a simple arcade button (using the below Learn guide), and then use that LED and button to communicate information in different ways. The more I play around with this project, the more ideas I come up with. So be sure to check back here often as I will post more ideas as I come up with them.
Parts Used
I used the NeoPixel Mini Button as shown in the guide above, but used the QT Py ESP32-S3 board with the NeoPixel BFF to drive the NeoPixel, then just soldered one side of the button to 3V on the QT Py, and the other side of the button to A2.
You could also simply skip modifying the arcade button, and just use the built in NeoPixel on the QT Py. You could even just use the built in pushbutton on the QT Py and skip the Arcade Button all together. This guide isn't so much about the specific project, as it is about the possibilities of the new Adafruit IO Actions. You can set this up with any NeoPixel and button.
With that in mind, here are the products I used:

-
Boston MBTA stop prediction sign An LED matrix device to show predictions of arriving buses and trains using the MBTA v3 API
To get to the Git hub repository for this project click here: https://github.com/dufus2506/MBTA-bus-train-stop-prediction-sign
Built on the excellent work of others I've seen, I have designed my own MBTA sign to tell you when the bus or train will be leaving a stop. This sign can show predictions for for bus lines, subway stations, and commuter rail stations.
This is designed to be used on the Adafruit Matrixportal M4 running Circuitpython https://learn.adafruit.com/adafruit-matrixportal-m4 and using a 64x32 RGB LED matrix. https://www.adafruit.com/category/327 Pick whatever size you like.
I managed to keep the code very small, and with a minimum number of libraries so the limited memory of the M4 would not be a problem. And I improved on the code comments a bit to make it easier for you to configure your own sign.
I removed all but the most essential libraries from the board. I have only the libraries shown in the image on my board.
Apart from that I tried to make the sign as useful as possible with the ability to see predictions for more than one stop or bus route. You can add as many stops/routes/lines to a sign as you need, though it's not very practical if the sign has too many. You don't want to be waiting too long for sign updates to see when your ride is leaving.
Because the sign updates every thirty seconds, you won't need an MBTA API Key to make it work. You need one if your project will be checking the API multiple times a second. That's not very practical for this sign, so no API key necessary here. But you will need an Adafruit AIO account so that you can set the clock properly. The free level is just fine for clock setting. Get one here: https://io.adafruit.com/
Your settings.toml file should have the following entries:
CIRCUITPY_WIFI_SSID = "Your_SSID"
CIRCUITPY_WIFI_PASSWORD = "Your_Password"
AIO_USERNAME = "Your_AIO_Username"
AIO_KEY = "aio_Your_Really_Long_AIO_User_Key"
timezone = "US/Eastern"
Don't forget the timezone entry, or your clock may be set to GMT. WiFi settings are case sensitive in the settings.toml file, so be sure to match everything correctly for your WiFi network.
When I was done I had the files and directories seen in the image below on the board. All but the lib directory are empty.

-
Adafruit Memento Time-lapse w/ online upload & email notification Adafruit Memento Time-lapse Camera with Online Upload and Email Notification
This guide shows how to turn your Adafruit Memento (ESP32-S3) board into a time-lapse camera that:
- Captures images on a schedule or with a button press
- Uploads them to Adafruit IO over Wi-Fi
- Triggers email notifications using a feed
- All using CircuitPython and the PyCamera library!What You Need
- Adafruit Memento Board: https://www.adafruit.com/product/5843
- microSD card (optional, for GIF recording)
- USB-C cable
- Wi-Fi network
- Adafruit IO account: https://io.adafruit.com
- CircuitPython is installed on the MementoSetup
1. Installing CircuitPython
To install CircuitPython on the Adafruit Memento, I followed this official guide by Anne Barela and John Park:
🔗 [Memento Camera Quick Start Guide – Install CircuitPython](https://learn.adafruit.com/memento-camera-quick-start-guide/install-circuitpython)
That page walks you through how to:
- Put the board into bootloader mode (double-tap reset)
- Drag the `.uf2` file onto the board
- Verify that the **CIRCUITPY** drive appearsMake sure you use **CircuitPython 9.0.0 or later** to avoid filesystem corruption issues.
2. Install Libraries
- adafruit_io
- adafruit_requests.mpy
- adafruit_ntp.mpy
- adafruit_logging.mpy
- adafruit_pycamera
- adafruit_ov5640
- adafruit_connection_manager.mpy
- gifio.mpy
- bitmaptools.mpy
- ulab (folder)3. Create settings.toml file on CIRCUITPY with this:
CIRCUITPY_WIFI_SSID = "YourNetworkName"
CIRCUITPY_WIFI_PASSWORD = "YourNetworkPassword"
ADAFRUIT_AIO_USERNAME = "your_username"
ADAFRUIT_AIO_KEY = "your_aio_key"4. Main Code
Paste the following into code.py on your CIRCUITPY drive:
What I did
- I used the fancy camera CircuitPython code by Anne Barela and John Park, and the Doorbell Camera code by Brent Rubell to help create the code above.
- My main focus was to get photos uploaded to Adafruit IO with the timelapse and camera shutter options.
How It Works
- The camera connects to Wi-Fi and Adafruit IO
- Takes snapshots using the shutter button or on a time-lapse interval
- Encodes image data as base64 and uploads to Adafruit IO feed
- Sends a "trigger" signal to another feed to notify you via email5. Set up Feeds on Adafruit IO
- Go to io.adafruit.com
- Click on the tab 'IO'
- Go to Feeds and create two. I set up a 'camera' feed and a 'camera-trigger' feed.
- The "camera" feed will take photo uploads, and the "camera-trigger" feed gets a 1 or 0; this is used to trigger an automated email action.

-
🎵️ Media hub 2.0: Media control w/opt Bluetooth Overview
Physical controls for a more enjoyable media playback experience.
Features
- Responsive volume knob & mute button.
- Transport controls (play/pause, stop, FF/REW, skip tracks).
- Pair up with your favourite Bluetooth® speakers.
- Quick, physical connection (don't have to go through menu system to pair with keypad & speakers).
- Customizable controls/scheme.
This project tries to improve over the original "Media hub" presented here.
- More compact design
- Bigger volume knob - not interfering with macropad keys.
🛒️List of main material/hardware
(See section "More tools/materials/hardware" near the end of this note for extras)

-
Rust on the Adafruit Feather RP2350 HSTX Let's start with the Debug Header, the little 3 pin interface lets you peek into the Pons of the Raspberry Pi brain. You can find this header on the Raspberry Pi 5, the Raspberry Pi Pico (H, and WH), and now happily the Adafruit RP23XX boards thus far. By connecting a Pico Probe to this interface, you can get a lot of debug information back on your big main computer. ARM refers to this type of interfacing / debugging as Semihosting.
With the 3-Pin JST cable, cable plugged into the D header on the Pico Probe and the other end of that cable onto the Debug Header on your Feather (Shown above); With the Pico Probe connected to your computer, and you can connect the Feather to any USB power source, or back to your computer as well. Once you've done that, you're ready to issue the
cargo runcommand, so long as you have the required software installed below.Back to the code we cloned all of the way at the top of this article. With all of the software above installed, and your computer connected to the debug probe, the probe connected to the feather, and the feather connected to power or your computer you now have a system that is ready to go. We really can run that
cargo runcommand and have Rust code on our feather. But what are all of these files and what do they do?.cargo/config.tomlandcargo runThe
.cargo/config.tomlfile configurescargo runto useprobe-rsto flash to the boards ROM. You will need a Raspberry Pi Debug Probe in order to use this, but it makes development MUCH easier, faster, and more fun! You connect the Debug Probe'sD(for debug,Dfordefmt😉) side to the board's Debug Port. Once done connect the Adafruit board, and Debug Probe to your computer. You can flash at will withcargo runand see any debug messages in your computer's terminal thanks todefmt.memory.xIf you've never seen a
memory.xfile before, and have no clue what it is; I don't blame you for being curious. It's an odd file, filled with things that aren't Rust or C, or anything else that fits the norm. This file actually tells the linker where to put sections of the binary. It makes sure everything is in order so that when the microcontroller jumps to flash memory, the expected data is there ready for it. It also tells the the linker how much RAM the target board or chip has.build.rsThis build script copies the
memory.xfile from the crate root into a directory where the linker can always find it at build time. For many projects this is optional, as the linker always searches the project root directory -- whereverCargo.tomlis. However, if you are using a workspace or have a more complicated build setup, this build script becomes required. Additionally, by requesting that Cargo re-run the build script whenevermemory.xis changed, updatingmemory.xensures a rebuild of the application with the new memory settings.
-
Zephyr Quest: IoT Toggle Switch for Feather TFT This guide shows how to make an IoT toggle switch with an Adafruit Feather TFT ESP32-S3, Zephyr, and Adafruit IO. Key features include: GPIO input for Boot button, LVGL graphics, MQTT over WiFi with TLSv1.2, and USB serial shell commands for saving WiFi and MQTT configuration settings to NVM flash. This guide is intended for people who want to learn how to write applications in C using Zephyr APIs.
Demo video: IoT toggle switch: Zephyr + Feather TFT + Adafruit IO
Previously in this series of guides about using Zephyr on Adafruit hardware, I focused on setting up developer tools and writing Devicetree board definitions. This time, I'm moving up the stack to show how to build an application tying together several Zephyr APIs along with a custom board definition.
Building an IoT app with WiFi, TLS, and graphics is unavoidably a bit complicated. It took me about three weeks to write the code, which totals a bit over 2100 lines. Listing all of that here would be awkward. If you want the details, you can browse the code in my zphqst-03 GitHub repo. The code has lots of comments, including citations for the references I used while learning to use the Zephyr APIs.
This guide will focus on:
- How to build, run, and configure the IoT toggle switch app
- High level tour of the source code with GitHub links: which files do what?
- Understanding C language features that you'll need to use Zephyr APIs effectively: structs, function pointers, etc.
- Zephyr troubleshooting tips: diagnose and fix memory allocation issues, enable various types of debug logging, etc.
- MQTT testing with
openssland themosquittoMQTT broker with its companion command line tools,mosquitto_pubandmosquitto_sub


